
Organizing Docs for Premiere Pro
After years of editing on Final Cut Pro 7, it was finally time to choose a new editing software. I weighed the advantages of going back to Avid versus learning FCP X or Premiere Pro CC. Ultimately the marketplace decided for me…most folks here in Hawai‘i were switching to Adobe Premiere, and that is what they are now using at the local film school where many of the filmmakers with whom I collaborate teach.

Last summer I began editing Kū Kanaka: Stand Tall with producer/director Marlene Booth, using Adobe Premiere Pro CC, 2015 edition and we are now about 3 months into editing it. Many people have been asking if I have come up with a written best practices workflow, and so I’ve begun to document how we are editing the show. I will likely break this up into several blog posts, so stay tuned for more to come. A quick disclaimer…this is my very first Adobe premiere long form project. I don’t claim that this is the only way to organize material, or the best way. But for now this is my way. I am very open to ideas of how to make this process better.
When setting up a long-form documentary project, my main goal is to organize the footage in a way that makes it easy for me to find any clip over the long haul of the project. It’s not unusual for me to have to take breaks from a project and then come back to work on them after several weeks or months. For example there is one film, Finding KUKAN, which I’ve been cutting on and off for over 4 years now, and which has over 7 TB of footage. It’s a huge timesaver for me as an editor in the long run to organize well-labeled clips into well-labeled bins so I can find everything.
For me, it’s also important to have all my media well-organized on an external hard drive. So before I begin working in Premiere, I gather all my video footage, stills and sound files and organize them on the hard drive. This organization will be replicated exactly within Premiere Pro. The goal for me is to have clip names and bin names that match the media file names and folders on the drive.

Here is a screen shot of how I organize my footage in bins on my external hard drive. People nowadays use the word “bin” or “folder” interchangably…as an old Avid editor I still use the word Bin, but when working in the Mac OS, Folder would be the correct term. The Folder on the Mac desktop will become the Bin in the editing software. But I will use the words interchangably, as one is simply a representation of the other.
So you can see that on my external hard drive there is a folder called “Ku Kanaka Media” and this is where every single piece of video, sound and stills will be stored. You can also see that I have organized footage by type. The “Archival” folder holds all video clips that come from archival sources, such as old television news stories or old film clips we have pulled from a film archive. GFX has graphics. Pidgin Documentary Footage includes footage from a previous film that includes our main character of Kū Kanaka, Kanalu Young. YouTube Videos includes videos we have downloaded from YouTube which we are using as temporary placeholder footage until we can license the actual archival footage.

Within these folders are sub-bins/folders that show more specific categories. For example, we have already amassed hundreds of stills, so I have organized those into sub-bins to make them easier to locate when I am editing. You can have as many bins as you need, so think about your film and name your materials in a way that makes the most sense to you. For documentary, I organize material mostly by thinking about how I’m going to use the footage in a scene, and so the folder or bin names will lead me to the scene in which I will use the material. So your folder/bin names will be very specific to your project.
A couple of things to keep in mind. Since you are working in your project, there is no need to put the project name in all your bin/folder names (i.e.: Ku Kanaka Stills, Ku Kanaka Music). I much prefer simpler names for folders: Stills, Music, etc. I also don’t like the use of punctuation in file or folder names, except for an occasional underscore. Please save the parentheses and commas for when you write your treatment, and leave them out of the file names.
 Now lets talk about the video footage that was recorded for this particular documentary, which includes interviews, b-roll and cinema verité footage. The first half of the footage that was recorded for this documentary was edited in Final Cut Pro 7 for fundraising sample reels over the last two years. Consequently that footage, which was shot on either a Sony F3 camera or a Canon C300, was all transcoded to Apple ProRes. So I organized the ProRes footage in bins with the name of each scene, i.e.: Black Point Jumping, and put all those bins into one big bin called Footage. So I know that everything in the Footage bin is in ProRes codec.
You will also notice that there are separate bins named Interviews, RAW Media_C300 and RAW Media_SonyF3. The Interviews bin includes all the interviews that were recorded early in the production process and transcoded to ProRes. However, once we determined that we were going to edit in Premiere, we stopped transcoding footage to ProRes and chose to edit this material in the native camera codecs. So everything that is in the Canon C300 native codec is in the folder called RAW Media_C300 and ditto the RAW Media_SonyF3. Different footage from different cameras may need to be treated differently when we get to the end of the editing process and begin color correcting and finishing the film. It’s important to me to know which codecs are which and so organizing the material this way will help me find that footage quickly. I know that some editors still transcode everything to a single codec before editing and there may be compelling reasons to do that. For us, we knew we would have a lot of temp footage coming from multiple sources, including internet downloads. Not having to transcode everything before the offline editing can begin is a huge timesaver, and also takes up far less space on our hard drive.

You can see that the Raw Media Folders contain a sub-folder that has a particular naming convention. This is how I like to name footage folders: Date of Recording (YearMonthDay) _KeyWordDescriptor_Camera. So for example, the folder called
20150227_Gwen_Kimo_INT_C300_2
was recorded on 2/27/2015, and it is an interview with the characters Gwen and Kimo recorded on the C300. The “2” means it was Card 2 recorded at that time, which lets me know that there is another folder with the footage from Card 1.
Inside that folder you see a lot of subfolders…these are the folders that are automatically created by the camera on the card when it is recording. Note the difference between the C300 Raw Media folders and the Sony F3 Raw Media folders. Every camera has a unique file structure, and you have to keep that file structure intact in order for your editing software and camera software to know how to treat this footage. So when I get footage from the DP or the DIT or the director on a hard drive, I copy it over and leave the folders exactly as they come to me. All I do is change the name of the highest folder (which usually comes to me as Card 1, Card 2, Card 3 or something like that), and rename it with my typical naming convention, as detailed above.
We have spent a lot of time organizing footage and haven’t even launched Adobe Premiere yet! But it is so, so important to get this file organization correct early on, and to name your files correctly before you import them into Premiere. This is going to save oodles of time down the line. Also, for young people early in their careers, this type of project organization is often the work of the assistant editor, or the editing intern who aspires to be the assistant editor. Getting it right will make you shine in the eyes of the editor, who will heap praise on you for making their work so much easier.
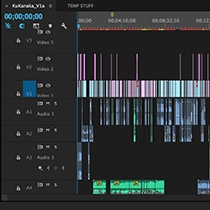
 Ok so it’s finally time to launch Adobe Premiere Pro. After the software launches, create a New Project and give your project a name. Our project is named Ku Kanaka 2015. Then use the Media Browser to begin importing all your footage into the project. There are many ways to import media. Personally I like the “Drag and Drop” method, which means to drag a folder from the Media Browser and drop it into the Project Window. To do this you need to arrange your windows in Premiere so that you can see both the Project Window and the Media Browser Window at the same time, as you see in the image on the left. You also need some empty space at the bottom of your Project Window to drop new bins into.
I like to import footage into my project one bin at a time, and then carefully check each bin to make sure that every bin and every clip is present and accounted for by comparing the bin with the folder on the external hard drive at the Finder. Occasionally, an empty bin will import, and I will need to do a second import to get all the clips into Premiere correctly. I don’t know why, but that is why I double-check everything. When you finish importing clips and bins using the Media Browser, your project should look exactly the way your folders look on the Finder.
As you add new footage or music or sound effects to your project, just follow the same protocol: place the media in your Media Folder on your external hard drive in a well-named bin (or an existing bin, as the case may be). Then use the Media Browser to import the new footage into your project.
You now have a new organized project with all your bins and clips. Before you start editing, this would be an excellent time to make an exact copy of all your organized media on a second external hard drive and then store that drive in a safe place, preferably in a different location than where you store your main editing drive. That way if your editing drive crashes or is lost or stolen, you will have all your media backed up and ready to get back to editing. This is such a life saver…back up your media and your project, always, always, always!
Now that you are ready to begin editing, notice that I created a bin called SEQS Shirley. This is where all my edited sequences will go. Now you can create a new sequence and begin editing some rough assemblies of your footage.
The first sample reels of this film were edited in 2013 and 2014 on Final Cut Pro 7, and we did import already edited sequences from FCP7 into Adobe premiere. I will cover that process in an upcoming blog post.
Got any questions about this blog post? Or ideas about how I can make this process of setting up a documentary project better for Adobe Premiere? I would love to hear from you. Feel free to leave a question or a comment. And you can always reach me via my Facebook or Twitter accounts as well. Happy Editing!
Hi Shirley, Thanks for sharing your process for organization. Very logical,clear and easy to follow system you have developed.
I commend you for your simplicity !
Mahalo nui,
mm
Thanks for your kind words Mike. I hope it’s helpful.
Incredibly helpful! Thank you so much for taking the time to write this and share your knowledge.
I’m curious to know how editing native, without transcoding, is working for you. Any slowdowns, lags, crashes? Or is transcoding truly a thing of the past? Please report back if you have time. And thanks again.
Hi Mike. Thanks for your comment. With regards to editing native, so far so good! I have a 32 minute timeline now containing native C-300 and Sony F-3 footage, plus .mp4 videos from the internet, plus ProRes, plus JPEG stills, plus AIF and WAV audio, and I have not had any slowdowns, lags or crashes. I am editing on a Macbook Pro, 2.6 GHz Intel Core i7 with 16 GB of RAM and a Thunderbolt G-Drive, so I have plenty processing speed, and in general I only have 1-2 layers of video, so I’m not pushing the system that hard. Not having to transcode is a dream. Of course before we output a finished film, we will have to do some transcoding to get everything in the same frame size and frame rate and to deinterlace some interlaced footage, etc. But at that point we’ll only be dealing with a half hour of footage instead of a mountain of source material. This was the great appeal of working with Premiere and so far it is paying off. –Shirley
Thanks for this. Have you ever switched from one edit system to another mid-project? I’m still in FCP7 and wonder if I should change to Premiere or FCPX.
Hi Dan, this is the only project I’ve switched from FCP7 to Premiere. Once the project gets very big or complex, I just don’t have the time and budget that it would take to transfer everything. It’s a very subjective call. How much longer will you be editing? How do you intend to finish the film in terms of color correction and effects? Are you using other Adobe products heavily like After Effects? The answers to these questions may determine whether it’s worth the time/money/effort to switch or not.
In case it’s helpful, here is another blog post from another filmmaker that I found online…he did move his project while deeply into an edit, and he details the process and more importantly the “why.” http://vashivisuals.com/grind-perfecting-post-production-workflow/
–Shirley
Actually Dan, I did my very next post on just this topic:
http://shirleyt.wpengine.com/2015/12/05/fcp-to-premiere/
Aloha, Shirley
Shirley,
Thanks for a great explanation of your initial organization. However, I am editing a hour doc and after many years editing on Avid, am relatively new to Premiere and continue to be frustrated with media management. I am doing a show on a species of shark and we are getting media from all sorts of sources. I struggle to find all the shark shots because they are spread out among many bins, many of which are nested in multiple bins. Neither list view nor thumbnail view seems to allow me to move fluidly or quickly to find my sharks among all the other “topside” footage.
Now I see that if I use the Media Browser in thumbnail view I seem to have the best of both world in one panel: a nice expanded view to list view to left and a bins thumbnails open to the right. If I click on that thumbnail it opens in the source window. Is there a problem editing from the Media Browser rather than the project panel? I can’t find any reference to this so wonder if there are caveats I’ll run into or if its okay. OR… maybe there is a better way to have organized my footage so the sharks don’t lurk from so many (hidden) bins. Thoughts?
Hi Greg,
Thanks for your comments and questions. I am still a relative newbie to Premiere, so I can only speak from my short time working on the software. But I think that Media Browser isn’t designed to be used to view clips and edit the way that you are talking about using it. And I think if you pull in a clip from Media Browser to use as a source, you are importing it into the project again, creating another clip each time. So eventually it will make your Project even more unwieldy and the clips even more difficult to find.
However, I have a couple of decades of non-linear editing experience, and I can tell you that organization at both the finder level and within your project is the key to being able to locate all your clips and mediafiles throughout your edit. I think your challenge is that you’ve got a whole mess of shark footage…so how can you organize it in the Project so you can find the shark shot you are looking for? Perhaps you need to come up with clip names or bin names that better describe your footage: By type of shark? By time of day or type of waters (bright, dark)? By mood or behavior, i.e.: serene looking shark, menacing looking shark? Basically looking at your show and trying to think through how you are going to use the footage, and then organizing the footage somehow by type. And, as you have already figured out, I would be careful of putting too many bins within bins…that just buries your clips deeper and makes them harder to find. But if you take a half day or a day to find all your footage and organize it in a way that makes sense to you, that will save you tons of search time over the course of the rest of your edit.
The film I am editing this week has about 300 bins and thousands of clips and they are well labeled and well organized and for the most part I can find everything. Because the media is very well named, I can also use the Spotlight search function at the Finder level to search for keywords, which can tell me where the file is located at the Finder level, and that helps remind me where it is in the project, since my project/bin/clip organization matches the way the media files are organized on the drive.
Hope this is helpful, and best of luck to you on your project. –Shirley
Hey Greg,
Premiere has “Search Bins” that are like Smart folders that can auto-populate with clips marked with certain metadata. You can right click in the Project panel and “create new search bin” or click the icon next to the search field in the Project panel: it is a folder with a magnifying glass.
You can, for example, create a search bin that collects clips with the metadata tag “shark” (if you entered that in the metadata somewhere). It’s a great feature because clips can exist in multiple search bins, which eases the confusion of wondering how to file the clips away. For example, you could create Search Bins for “shark”, “ocean”, “feeding”, etc. and a single clip could exist across all those bins, provided it has all the correct words in its metadata. Hope this helps!
Hi Shirley,
This article was very helpful for this documentary that I am about to begin I also have a few questions. The documentary that I am working on will ultimately will be broken up into 7 or 8 webisodes that are currently being shot in a number of different cities. We are located in Chicago and we will also have another editor working from New York. I plan to use your a very similar set-up/ file structure as you did. I am plan to build the master project for the AE to have control of the footage and where he/she can log ftg, add notes ect. For the two editors working I will have create two separate project for each of them and asked them to use the media browser to import whatever elements they need. What do you think? The other thing is I am struggling thinking of what the sequence settings should be. We are shooting with Canon C100 & 5D, along with a Ninja. I am hoping that I can have all the sequence match the same codec from the start rather than have to make changes later. If you have any suggestion I would be extremely grateful.
Thank you
Norvin
When I first began working with APP I worried a lot of about sequence settings, but in general I have found that they don’t matter a whole lot. The software is remarkably adept at letting you throw nearly any file type into the timeline and edit with it. What does matter a lot are your export settings when you are ready to output.
For sequence settings, this is what I do: If it’s a project where the source material all has the same codec, ie: the source footage was all recorded with the same camera, or I am editing a trailer for a film where the source footage comes from one quicktime output of the film, then I will just match the codec, frame size and frame rate of the source footage in the sequence. But if I have a wide range of codecs, like the historical doc I am editing right now where there’s some Canon footage, some Sony footage and a lot of archival footage, then I choose what most closely matches what my final deliverables will be. In this case, we will be delivering 1080p for PBS, so I’m editing in a 1080p timeline.
Note that Adobe Premiere Pro creates a TON of preview files, and you and your editors and assist will want to come up with a plan of where the best place is to store those. There’s a useful explanation on the Premium Beat blog. http://www.premiumbeat.com/blog/three-things-you-need-to-know-about-premiere-pro-cc/
It’s when you output that you want to be sure that your export settings are exactly correct. I haven’t outputted a whole film yet, but I will be documenting the process in this blog when I finish Kū Kanaka later this spring/summer.
Your media organization seems sound. Best of luck to you in your project. Shirley
hi, i found this post because i was i was searching for premiere pro organizing AFTER a project is complete, do you have any advice on this subject? i need to keep my computer unloaded with premiere projects because they eat up a lot of space and i have ample external backups. thank you!
Sorry for the extremely slow response! I’ve been busy finishing not one but two films. Look for a new series of posts, beginning this week about the finishing process and the after finishing process! Aloha, Shirley
Hi Shirley,
Tremendously useful post! As a veteran doc editor, I learned from my very firsts job that organization in the edit room is key.
Its just a matter of how to best adapt those practices to our ever evolving tools. Thanks for the detailed breakdown.
I have what I hope is a quick question. It is something mostly encountered by doc editors, becasue of the sheer volume of materials we encounter. I have about 400 stills to replace in a film. The masters have come in and I want to find the simplest most automated way to exchange master for temp in the sequence. I realize sizing may impact the moves, but at least I can scale down if this is the case.
I should mention that I have been an Avid editor since the early days, but am forcing myself to become proficient with adobe and working on a few projects in it.. While I still love my Avid, Premiere is an absolutely tremendous product, and I think I am on the verge of saying it is superior, even for long form films. If I were not o stubborn I would have admitted thi sling ago!
Anyway, I appreciate any help you might have. Thanks!
Hi Doug,
I don’t have a fast way to exchange master stills for temp. I guess it’s like exchanging 4K media for proxies..if the file names are identical, you can relink the media from one set of media to the other. But renaming all those stills would take too long. And then you would still have to rebuild your moves to account for differences in scale.
I usually just select the still I want to replace in the timeline and Command-C copy the attributes, then Mark Clip to mark the in and out points. I edit in the new still and then right-click Paste Attributes on the new still, which will paste any keyframes and other filters like color correction. Then I modify the keyframes and filters as needed.
This would be a great task for a good assistant editor, if you are so lucky to have one. 🙂
I was an Avid instructor for 14 years and still have a soft spot in my hard for their User Interface…I would have switched back to Avid…I have a copy of Media Composer and an Avid Keyboard sitting here collecting dust, but the wind was blowing towards Adobe, so I went with the crowd and my clientele.
Best of luck to you finishing your project. Warmly, Shirley
I would like a list of the locations of all the files in the project — a sort of master explorer. Collecting etc, with project manager is OK, but being able to quickly find and access the raw file would be better. I am a very disorganized person, and too old to change. Surely the software should accomplish this!
Hmmm…I wonder if there is a way to do that. I haven’t gotten that deep into project and media management with Premiere, so I don’t know if that is possible. I’ll put it out there to the other readers in case any of them know. Good luck with your editing Randall.
I strongly recommend you use external hard drives to store all your media and keep media off the internal hard drive. Media files are big and gobble up a LOT of drive space. Project files are relatively small. You can use Project Manager to consolidate and copy media that was used in a project. I don’t have a blog post about that, but I bet there are many good YouTube videos on the subject that can help you. Best of luck.
Hi! Great post. Makes a lot of sense to organize at the finder level. So if i have a film with five years worth of high quality footage can i rely on premiere to be able to handle that kind of load with all of the clips imported without crash issues (say thats assuming computer specs are not an issue)? Or should I come up with an alternate plan for logging and importing as needed? Are smart folders pulling from whats already been imported or from media drive directly? Thanks!
Hi Shirley! Great post. I am about to start edit on a feature doc and I am used to Avid and FCP 7, though I have played around with Premiere. The main thing I”m trying to wrap my head around is audio track types and whether I should change all of my clips to dual mono before I start the edit. I’m concerned about exporting a proper OMF/AAF for mix when I’m done and don’t want to box myself in with my early choices for sequence setup and audio clip settings. Any tips to get me started on the right track?
Thanks!
I’m sure you’ve figured this out by now Amy, but just in case. I also had a hard time understanding the different types of audio tracks in Adobe premiere, stereo vs. mono in particular. On Kū Kanaka, I did edit with stereo tracks, and I did not make my audio track dual mono. No need. When I edited audio into the timeline, I right-clicked the clip in the sequence to Modify Audio Channels and monitor the audio I wanted to hear and mute the audio I didn’t want to hear. Usually this was on interviews where there was a lavalier mic on the left track and a boom on the right track. I would choose LL to monitor the left track only. This is where you can learn more. https://helpx.adobe.com/premiere-pro/using/clips-channels-tracks.html Good luck with your editing Amy!